You click print on a check in QuickBooks Desktop, grab the printed check from the printer, and the payee’s name is an inch too high. The dollar amount runs into the edge of the check, and the date falls into the memo field. Now you have a voided check and a stack of pre-printed checks that you’re a little hesitant to stuff back into the printer.
Fixing check alignment in QuickBooks Online and Desktop is one of those seemingly simple tasks with a surprisingly long list of potential solutions. The good news is that it takes very little time to fix if you know which settings actually move the text around. This guide will help you align checks in QuickBooks Online and Desktop, and covers the few settings that lead to most issues.
Checks are still a payment method for many businesses, and according to the 2025 AFP Payments Fraud and Control Survey, 79% of organisations surveyed plan on continuing their current or increasing their current check volume over the next two years. If checks are a part of your regular accounting, it’s worth the time to align checks properly.
Why checks print off the lines
A few issues are more likely to contribute to checks printing off the lines, and it’s worth addressing these before moving on to the grid:
- Printer scaling: if you’re printing at a percentage that isn’t 100% in your printer settings, every field will be moved, including the boxes and lines on the check stock
- Wrong check style: make sure you’re using voucher, standard, or wallet checks in QuickBooks
- Wrong stock size: not all pre-printed check stocks are the same
- PDF viewer: QuickBooks Online uses your browser’s PDF viewer, and Adobe Reader has some known issues
Addressing the first two issues typically addresses most problems, but see the rest of this guide for more options.
Know your check type
QuickBooks can print three check styles, and the instructions below apply to whichever you’re printing:
- Voucher checks: checks with two stubs at the bottom of the page, typically used for bills and payroll checks, and are 8.5″ x 11″
- Standard checks: checks with 3 checks per page with no stubs
- Wallet checks: smaller checks with a single stub on the left
Make sure you’re using the check stock that corresponds to the check style selected in QuickBooks.
How to align checks in QuickBooks Online
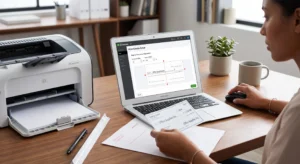
It’s best to print checks on blank paper first before printing on real check stock. You may have to make a few adjustments before the text aligns with boxes on the check stock. Additionally, it’s helpful to have the latest version of Adobe Reader as your PDF viewer.
The general process for aligning checks in QuickBooks Online is as follows:
- Navigate to + New, then Print checks
- Select Print setup
- Select a check type (voucher or standard)
- Select View preview and print sample, then Print
Use the printed sample from step 4 as a reference and place it on top of a blank check and see how the text aligns to the boxes. If everything looks good, print real checks.
If the sample doesn’t line up
If not, return to step 2 of this section and select No, continue setup, then select No, continue setup again and use the fine-tuning alignment grid to move the text until it looks good, then print another sample and repeat this process until everything looks good. If alignment is still an issue for voucher and standard checks in your browser, try printing checks in Adobe Acrobat Reader DC.
In Acrobat, make sure to Save as PDF when printing checks (see the drop-down next to Destination in your print window), then open the saved PDF in Acrobat Reader and print with scaling set to 100% or Actual size. Acrobat provides more control over scaling than most browsers.
One last note about alignment in QuickBooks Online: alignment settings fail to carry over to the next session occasionally, especially in QBO. If you find yourself having to realign checks every time you print, it’s a known issue that has nothing to do with your settings.
How to align checks in QuickBooks Desktop
QuickBooks Desktop provides two levels of adjustment: coarse adjustment, which moves text around in large jumps, and fine adjustment, which provides more granular control over alignment. The process below covers both:
- Open the File menu and select Printer Setup
- From the drop-down next to Form Name, select Check/Paycheck
- From the Check Style option, select Voucher, Standard, or Wallet, depending on which check stock you’re printing on
- If you’re printing on continuous stock (checks with perforated edges rather than single sheets of paper), select Continuous (Perforated Edge) from the Printer Type option
- Click Align
Click Coarse (or the template of your choice) and print a sample. QuickBooks prints an alignment grid on the sample so you can see how far off the text is.
From here, you can make adjustments in either the Vertical or Horizontal fields. Positive numbers move the text down or to the right, and negative numbers have the opposite effect. Print another sample and compare it to a real check until the text is in the right place. When you’re done, click Finish Setup.
If text still ends up in the wrong place after fine adjustment, the issue likely lies elsewhere. The print window may have scaling set to something other than 100% or Actual size, so make sure that’s the case instead.
How to align standard three-up checks
Standard checks in QuickBooks print 3 checks per page. The first check on the page prints in the right place, but the other two print slightly lower on the page.
Why it happens
This only happens with standard checks because QuickBooks treats the whole page as a single check and can’t adjust the spacing between checks. There’s no way to move the second and third checks up on the page without affecting the first.
Common causes
The causes of this issue are actually the same as the issues described in the coarse adjustment section, with scaling being the main culprit. If you’re printing at a percentage lower than 100%, the error gets multiplied across the whole page, resulting in the second and third checks printing lower on the page.
It’s also possible that the feed or stock size is slightly off, affecting the spacing between checks. Margins are another likely culprit, especially if there are extra margins in your printer settings that push checks down on the page.
How to work around it
If checks on your page consistently print too low, consider printing fewer checks per page to avoid the lower two check positions entirely.
If the alignment won’t hold
Once you’ve gone through the fine adjustment grid and checks are printing in the right place, run through the following list until you find the cause of the issue:
- Set scaling to 100% and disable any options that let you scale the check printing to fit the page or shrink to fit
- Disable any extra margins in your printer settings
- Confirm that the check style in QuickBooks matches the check stock you’re printing on
- Make sure you’re using the latest version of Adobe Reader (if printing checks with QBO)
- If multiple checks from the same sheet of stock print incorrectly, try printing a different check to see if the issue persists
Printing a check after alignment
Once checks are aligned, printing them is relatively straightforward. Both Desktop and Online allow checks to be sent to a print queue. The instructions below cover printing a single check.
Printing a check in QuickBooks Online
- Open the check you want to print and select Print later
- The number in the top right corner of the check changes to To print
- When you’re ready to print, navigate to + New, then Print checks
- Select the bank account you want to print the check from
- Tick the boxes next to the checks you want to print, then use the Starting check number field to indicate the number on the first blank check in your printer. If you’re printing multiple checks, make sure to use the Starting check number field to denote which check number you’re printing from, especially if you have multiple chequebooks
- Select Preview and print, then Print
Printing a check in QuickBooks Desktop
Printing checks works similarly to printing in Online, but it takes place within the program itself. The instructions below follow the same general process of printing a single check.
- In the Write Checks window, make sure Print Later (or To be printed) is toggled on for the check you want to print
- Navigate to File, then Print Forms, then Checks. Alternatively, you can print checks directly by selecting Print Checks in the home menu
- Select the bank account you want to print the check from
- Tick the boxes next to the checks you want to print
- Make sure the Starting check number field reflects the check number on the first blank check in your printer
- Select a printer and check style, then print checks
The Starting check number field is the most common source of error when printing checks, so it’s critical to make sure it reflects the check number on the first blank check in your printer.
Reprinting a check and cancelling a printing job
There are two options for cancelling a printing job or reprinting a check if things go wrong.
If some checks in your print job print incorrectly, there’s no need to reprint the whole thing. In Online, after printing your checks, make sure that No is selected for the checks that printed incorrectly, then select the check at the beginning of your print job. The ones that printed incorrectly are removed from the print queue, so only the checks you want to print remain.
QuickBooks Desktop has a similar option for determining which checks to print.
If you realise you’ve made a mistake while printing checks, pressing Esc stops the printing process before any additional checks print. Fix the issue, then print checks again and make sure the Starting check number field is set correctly if needed.
Pre-print check printing: a brief checklist
Run through this list before printing checks:
- Make sure the check style in QuickBooks matches the check stock you’re printing on
- Set scaling to 100% or Actual size rather than Fit to Page
- Disable printer margins
- Use the latest Adobe Reader if printing checks with QuickBooks Online
- Make sure the Starting check number field reflects the check number on the first blank check in your printer
- Double-check that text and numbers print in the right place after printing a test check on regular paper and comparing it to a pre-printed check
These few simple steps should address most issues related to checks printing incorrectly or becoming misaligned.
When should I contact support?
If you’ve ruled out the issues listed in the previous section and checks are still printing incorrectly, it’s a good idea to contact your check supplier to confirm the alignment of the stock you’re printing on. If the stock you’re printing on is non-standard, it may not be compatible with QuickBooks printing settings. You can also contact support if you suspect an issue with your QuickBooks account.
If you’re unsure what to do, prepare the information listed below when contacting support:
- Your QuickBooks version: Desktop or Online, along with the year for Desktop
- Your browser and version, if using QuickBooks Online
- Your printer’s brand and model
- Your check stock’s brand, style, and the company that prints them
- A sample printout showing how text prints on your checks
Get your checks lined up the first time
Need pre-printed checks that match QuickBooks layouts, or an experienced hand setting you up to print checks with your team?
Get in touch and skip the trial-and-error.
Frequently asked questions
Why are my checks printing too high in QuickBooks?
The usual causes are incorrect scaling and vertical alignment. In Desktop, enter a positive number to shift the text down. In QBO, return to the fine adjustment grid by clicking No, continue setup twice and move it down.
Where is the check alignment in QuickBooks Desktop?
Click File, then Printer Setup, select Check/Paycheck from the drop-down, select your check style, then click Align.
Why won’t QuickBooks Online save my check alignment?
QuickBooks Online has a known issue where alignment settings fail to carry over to the next session. If this happens, return to the alignment grid and enter your settings again.
Do I need Adobe Reader to print checks?
It’s not required, but QuickBooks Online works best with Adobe Reader set as your default PDF viewer, since other viewers have compatibility issues with QBO.
What is the difference between coarse and fine alignment?
Coarse alignment moves the printed text in larger jumps, while fine alignment provides more granular control over alignment.
Can the check stock itself cause alignment issues?
Yes. Pre-printed stock varies from company to company, so the problem can be the stock rather than QuickBooks. If it persists after adjusting your settings, ask your supplier whether the stock is standard and compatible with QuickBooks.
How do I print more than one check at a time?
Mark the checks as Print later, open the print checks window, select a bank account, tick the checks you want, set the Starting check number to the first blank check in your printer, then print.